

My son's third birthday is coming up next month and my husband and I decided to get him a new "big boy" bed for his room. While internet browsing for said bed, I came across this gem from Ikea:

The bed is reversible and can either be a low bed with a canopy or a loft bed with space to play underneath. The versatility and crafting potential (see: Ikea Hackers) piqued my interest and I convinced my husband to drive us 300 miles round trip in a borrowed minivan to the nearest Ikea that weekend.
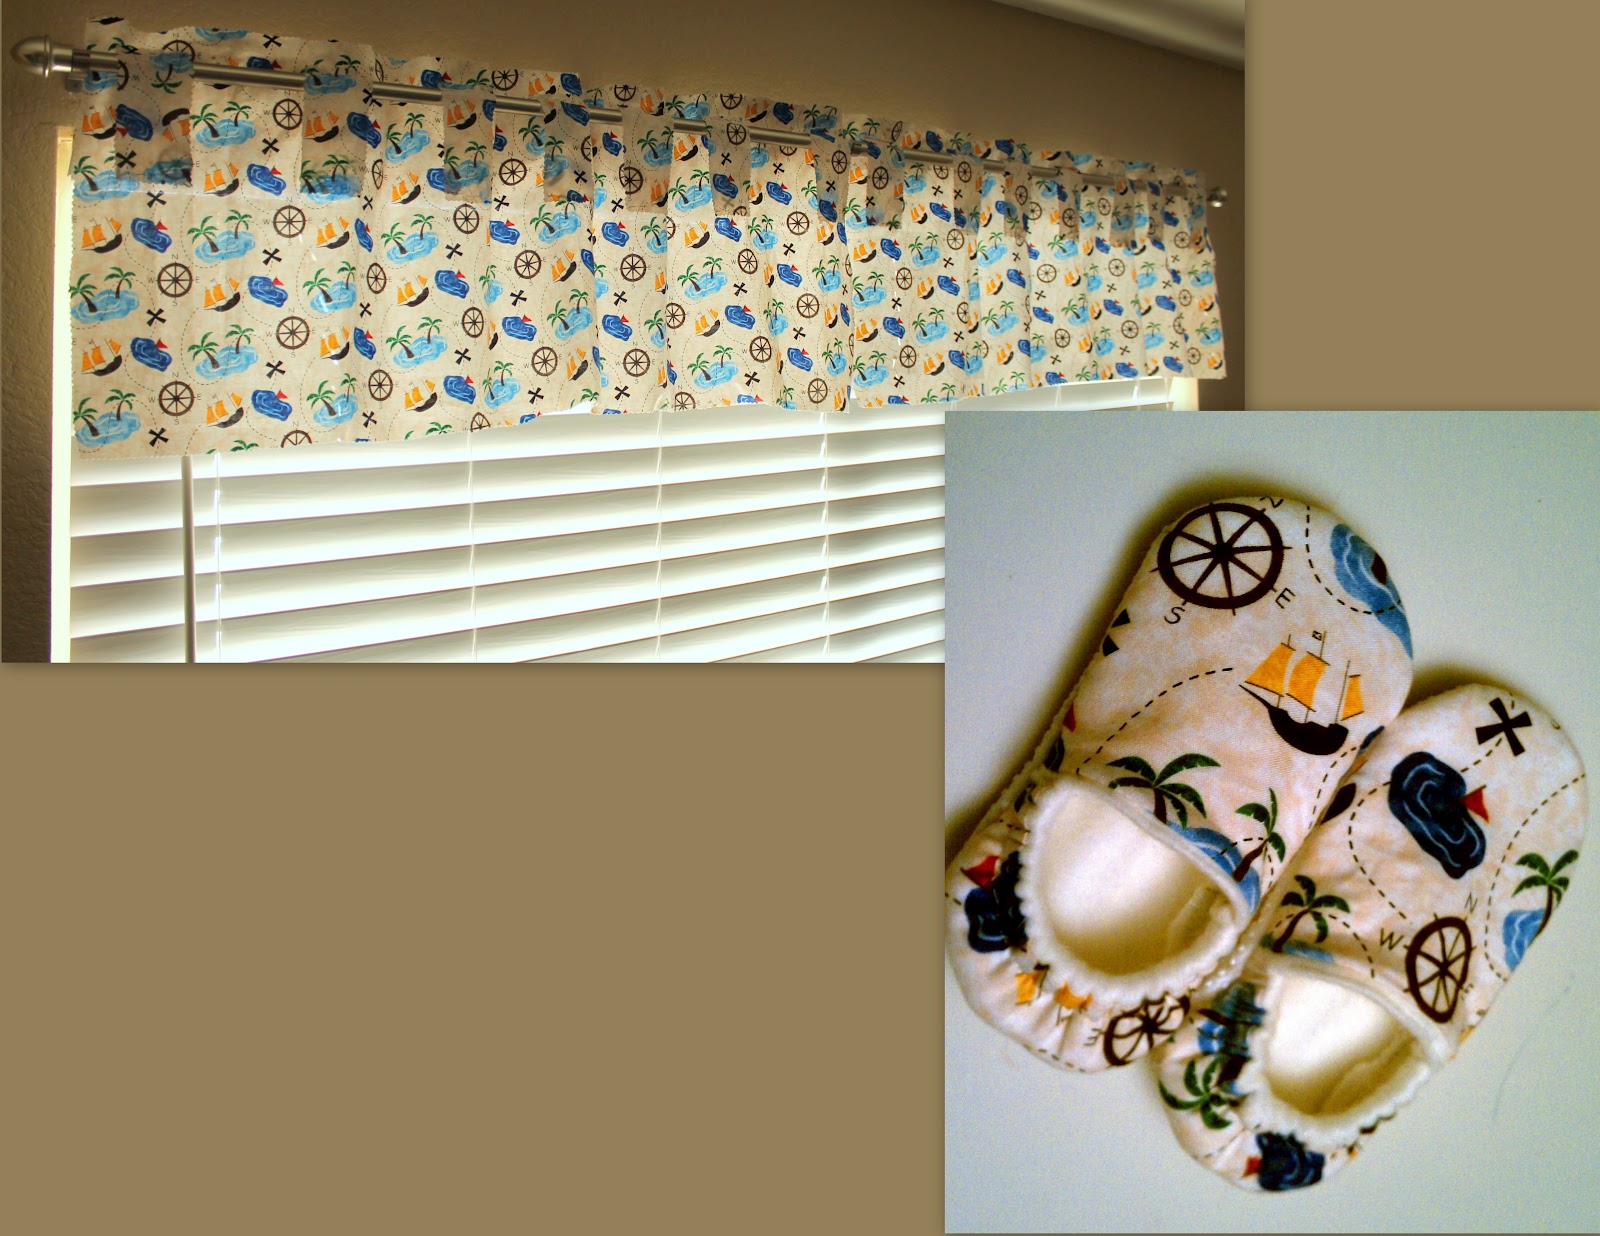
Last year, I made these easy-sew curtains for my son's room with a fabric called "Baby Pirate" (and had Scrunch Nose Sews make matching slippers from the remnants). I used this pattern as my inspiration for decorating the bed.

Unfortunately, I cannot provide any patterns for the individual pieces because I did them all free hand. I can provide the measurements for the big curtain piece. The front panel piece with the ship and the palm tree measure 62 inches long by 35 inches tall, in sky blue felt. The door piece with the crab, treasure map and sun measures 16 inches long by 44.5 inches all the way to the bottom.
Here are some close ups so you can get an idea how they are pieced:


The treasure map is detachable with adhesive Velco keeping it on the beach. The map itself is pieced together from remnants of the curtain fabric. All of these items are glued using Fabri-Tac adhesive, but any permanent fabric glue would probably work. So far it has held up really well.

The final outside piece is the pirate's treasure chest. The light blue felt panel for this one measures 41 inches long by 32.5 inches high.

There are 10 numbered coins in the chest, attached with adhesive Velcro.

My little swashbuckler had fun counting out the coins:

Next are the inside panels. Since the canopy that Ikea sells that matches the bed has a starry look to it already, I wanted the insides to have a celestial feel.
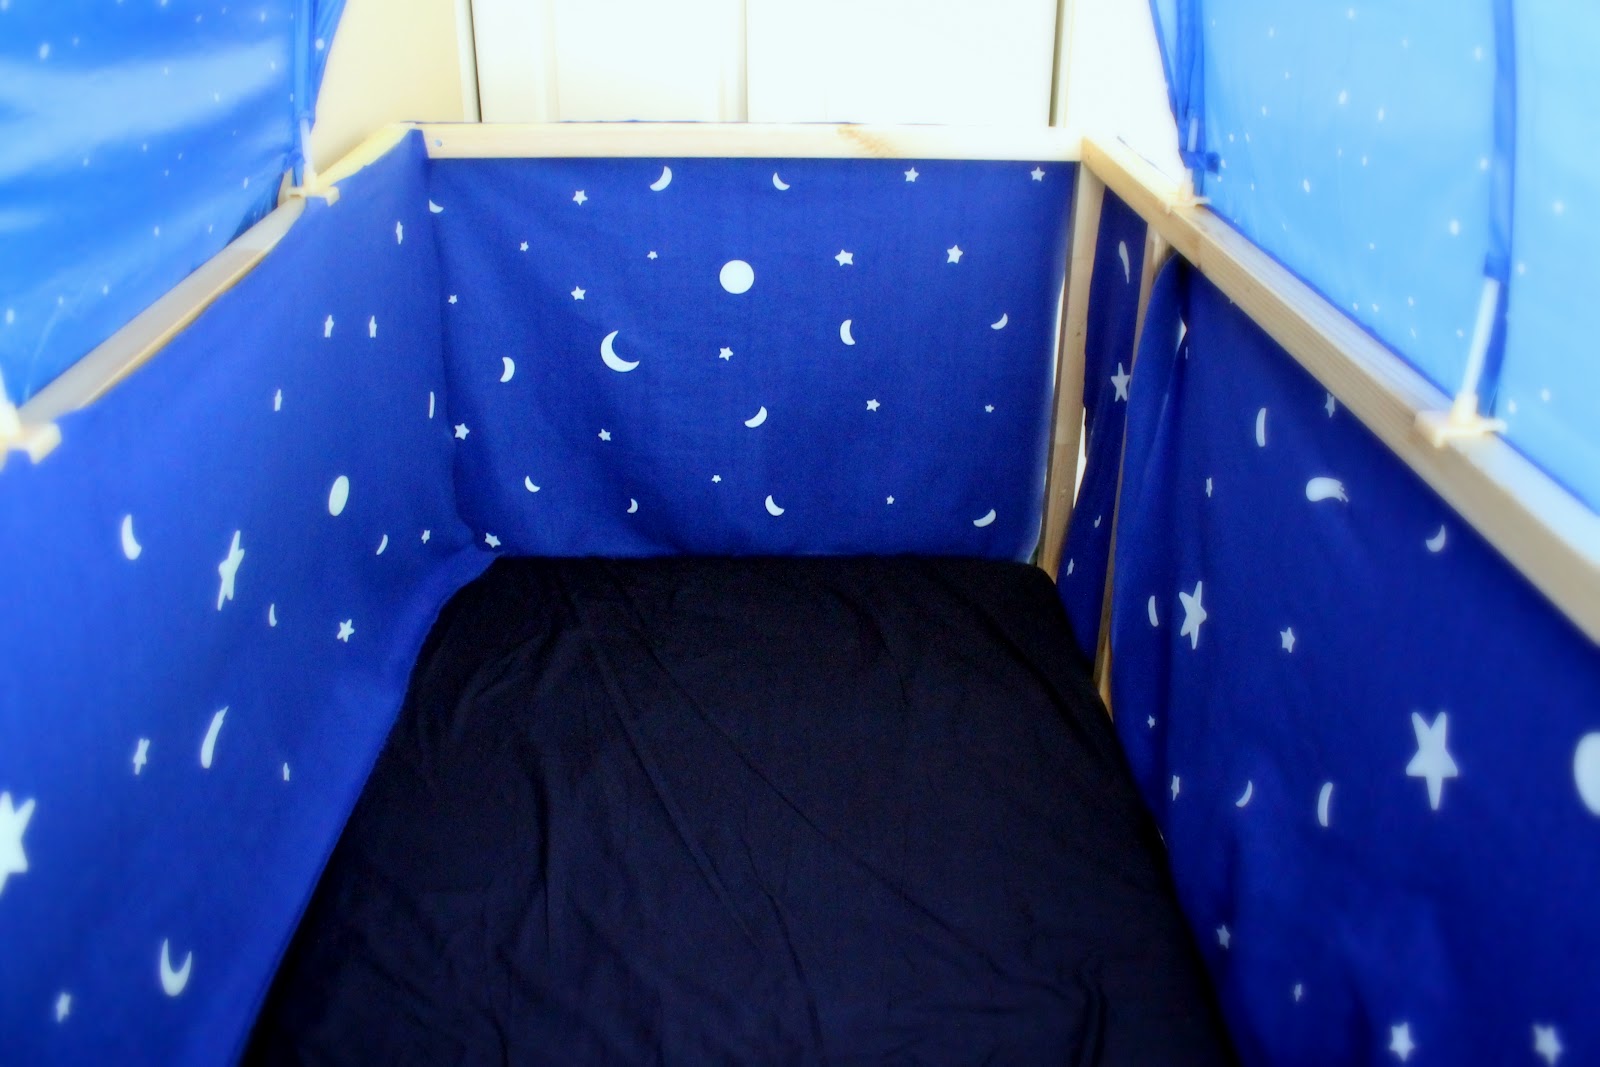
To achieve this, I cut panels from dark blue fleece that matched the blue of the bed as best as I could find. The two long panels measure 77 inches long by 30 inches high (I cut the door piece once the panel was hanging. The shorter side measures 38 inches long and 30 inches high.

I found these foam glow-in-the-dark stars and moons at the craft store. Using the fabric glue, I adhered them all over the fleece panels.

I hung the panels using as little glue and Velcro as I could so that if I wanted to change things later, I could. The clips of the canopy keep the bulk of the panels in place.

I decided to add some glow-in-the-dark stars to the canopy as well. I used some plastic ones I found at Walmart, but I'm sure comparable ones could be found at any big box or toy store. I researched a few constellations and decided to make the Big Dipper, Orion, Hercules, and Cancer on the inside of the canopy. They look a little upside down in the photo, but when you are laying underneath looking up, they go the right direction.

It's like napping in space! (The Super Mario blanket was my son's choice.) The effect is really cool in the dark but unfortunately I don't have a camera responsive enough to capture "glow".

Lastly, I made this felt pirate banner to decorate the wall opposite the bed. I'd give a run down on banner making but this post is long enough as it is. If you have a question about any of these things, leave me a comment and I'll try to help you out.

And now his room is complete!

Happy Crafting!
~Brittany


